 Starting a new garden can be daunting. It needn’t be, though. Take a few simple steps, do them correctly, and you are ready to plant your seeds. What steps, you ask? These steps:
- Chose a site
- Plan your garden
- Prepare the Soil
- Add Organic Matter
- Irrigation and Drainage
- Problem Control
- Cover Crops
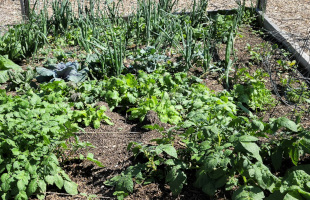
The site you choose needs to have a few characteristics for your garden to succeed. It needs to be near a source of water or you cannot provide the vegetables with enough water to grow. Hauling water gets old really fast, so either a spigot and hose or a pond with a pump are your best options. The site also needs to get at least six hours of sun a day. Finally, the site needs to be near the house. You are more likely to forget to weed or water if you cannot see the garden. Too, coyotes and deer are more likely to help themselves to your produce if you are far away.
Next you need to plan your garden. First you plan on paper. Or you can use one of the programs that put plants the right distance away, such as plan your garden or grow vegetables. You need to also consider the planting and harvest dates for your area. Your county extension agent will have those. Next, you need to order the seeds in time to plant. Waiting until the last minute means rush postage charges or late planting. Some plants, such as tomatoes and marigolds, work together well to reduce pests on both plants. Other plants, such as dill and fennel, interbreed or do not do well together. You should try to plant the companions together and the enemies apart. Finally, each year you need to rotate your crops by plant family to keep pests down.
Now it is time to prepare the soil. If you are starting a new garden and there are weeds and grass where you want vegetables, you need to remove the existing plants by the roots. The temptation is to rototill or disc the grass and weeds under, but that only spreads them. After you get the grass and weeds out, you need to spade or plow the ground at least three weeks before planting. When you are ready to plant, rework the soil into a fine seedbed.
You are not ready to plant yet, though. You need to work approximately three inches of compost into your soil. Make sure that what you buy has fully composted. With the surge in people wanting to garden, companies that make compost are having trouble keeping up. Some of the stuff that is sold is pretty green. Good compost smells like rich soil and has no identifiable pieces of matter in it. If you can tell what animal the manure came from, it is still too green and will burn your plants. Compost breaks up the soil, adds nutrients, and helps retain water, so it is important. After you work in the compost is a good time to do a soil test and send it off. This will tell you what nutrients you need to add in the form of fertilizer to get optimal growth. Your county extension agent has test kits. In Texas, the kits are free and the basic test is only $15. It takes about two weeks to get it back, though, so plan ahead.
Next you have to make sure there will be sufficient water at the right times, and that the garden drains properly when it rains. You do not want your plants to live in a swamp when it rains. However, you do want them to stay moist so they will grow. The best way to achieve this is drip irrigation. It needs to be laid down now, before planting. Drip irrigation delivers drops of water right to the base of the plant. This keeps from wetting the leaves and causing diseases while preventing as much evaporation. If you water between about 4:00 a.m. and about 10:00 a.m., the plants have the best chance.
Now, finally, you plant your seeds or transplants. At first, you water daily to help the seeds germinate and the roots get established. You want the dirt moist but not squishy. After two weeks, you can water two or three times a week. While lawns can get by just fine with an inch of water a week, vegetables and fruits need more to produce a good crop. When the plants come up and you can see where they are, mulch around them. Raise the level of mulch as the plants grow until you have three inches of mulch between the plants and between rows. This helps conserve moisture and keeps down the weeds. In addition, the mulch keeps things like tomatoes from getting rot from the soil. Cleaner vegetables are healthier vegetables.
Mulch helps reduce weeds and diseases. So does removing diseased plants immediately, putting them in the trash rather than the compost, keeping from wetting the leaves when watering, and watering early in the morning. Buying plants or seeds that are resistant to the problems in your area is important, too.
Insects, however, are inevitable. Rotating crops each year and planting decoy crops help. The goal is to use as few pesticides as possible while still getting a crop. Yes, it is still a pesticide even if it is organic. Make sure you do not use a pesticide on a fruit or vegetable plant unless the name of the plant is listed. Some pesticides are taken up systemically and you do not want to poison yourself. To that end, it is important that you obey the “time before harvest” rules on the label. Remember that the label is the law and if you do something against what is on the label and there is a problem, you can get in trouble.
The end of the season is not the end of the garden. Cover crops can be sown to add nutrients to the soil. These are usually nitrogen fixing plants such as winter rye, vetch, and clover. In addition, they prevent erosion and look nicer than bare ground. Most can be tilled under in the spring to provide additional organic material in the soil.
So, that is how to prepare a new garden. Good luck and happy eating.
 For more help gardening, buy my book, Preparing A Vegetable Garden From The Ground Up
Available in print or ebook from Amazon.com or other retailers, this book walks you from choosing the site of your garden all the way through what to do after the harvest. Buy a copy for yourself or a friend today!


Lots of people work high pressure jobs and have busy lives and coming home to enjoy nature and relaxing is something that is very important to inspire harmony in our lives.